Hangry & Angry Angry Cosplay finished dress
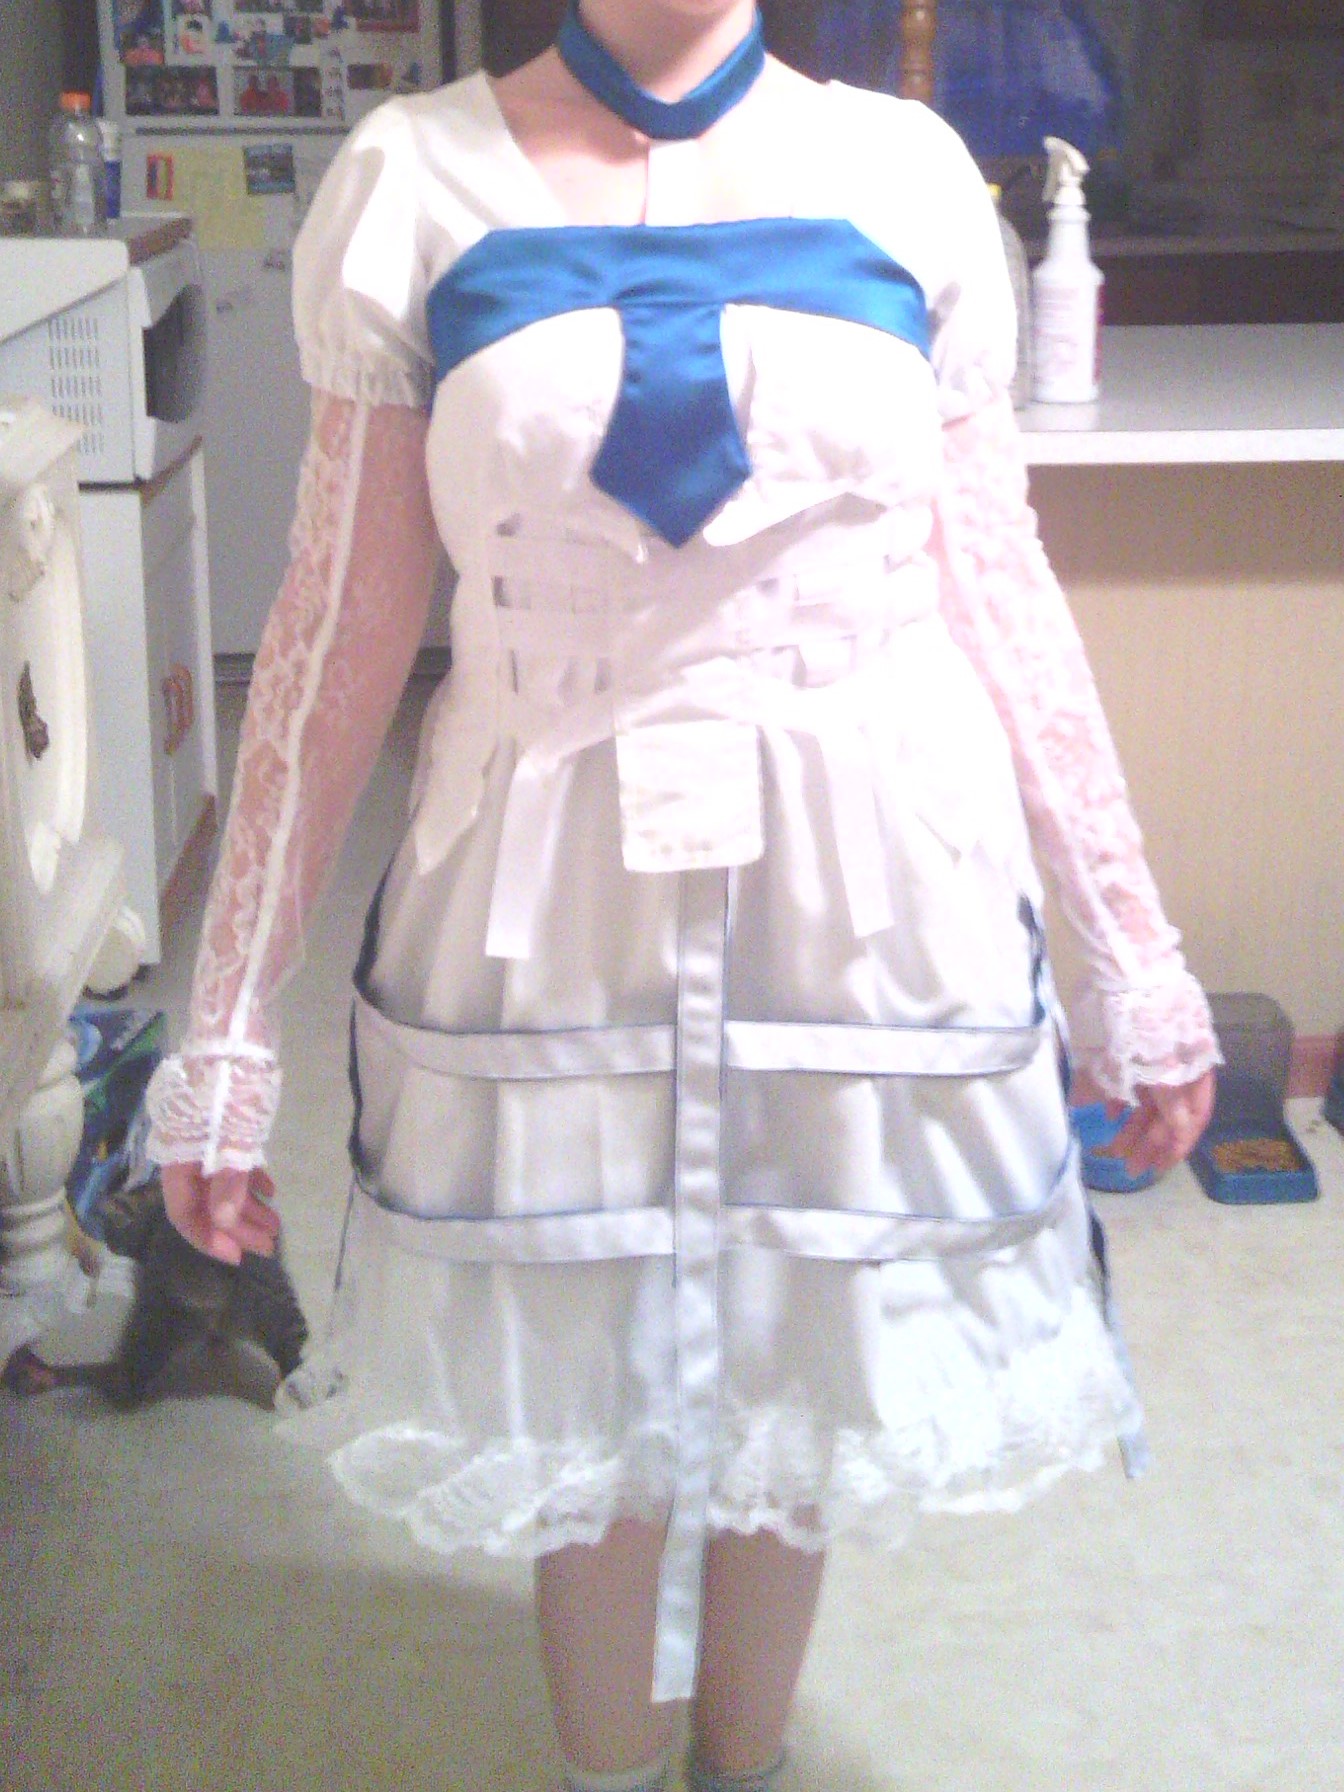
Japanese rock duo Hangry & Angry - Front of the Angry dress. Can't take full credit for making this. My sister helped make progress since I had to work six days a week with little time to work on it.
I've loved cosplay since I was child. I love creating anything; costumes, props, make up designs, ect. I'm always open for suggestions for new projects, so feel free to ask. I create my own sewing patterns, so it may seem like a longer process. It's still quick to do and provides the custom fit that makes all cosplays perfect and comfortable.
Japanese rock duo Hangry & Angry - Front of the Angry dress. Can't take full credit for making this. My sister helped make progress since I had to work six days a week with little time to work on it.
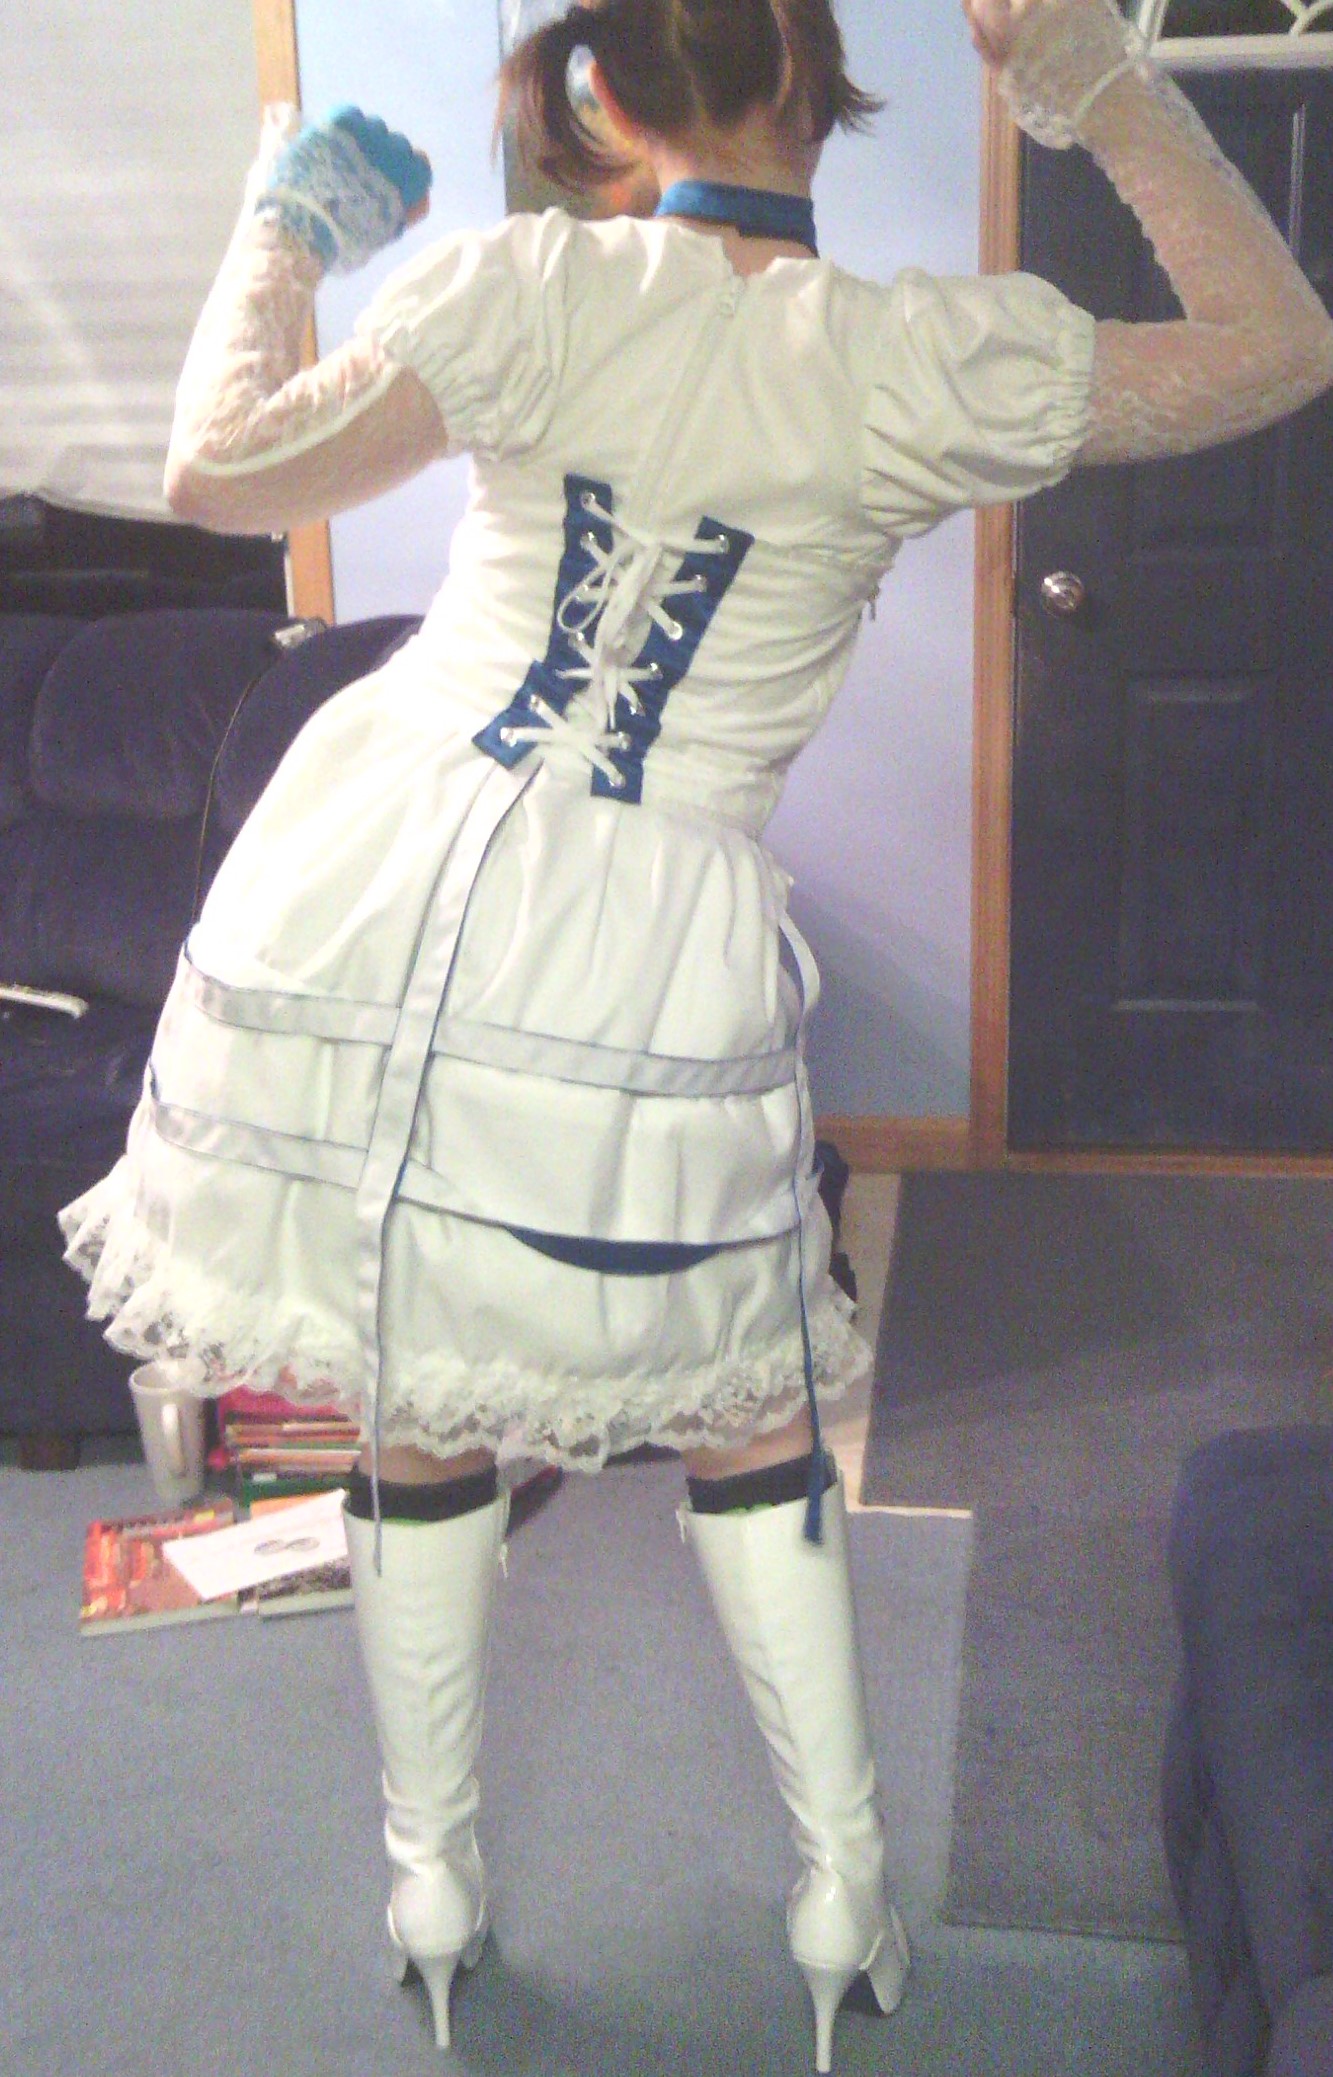
Back of the Angry dress. Can't take full credit for making this. My sister helped make progress since I had to work six days a week with little time to work on it.
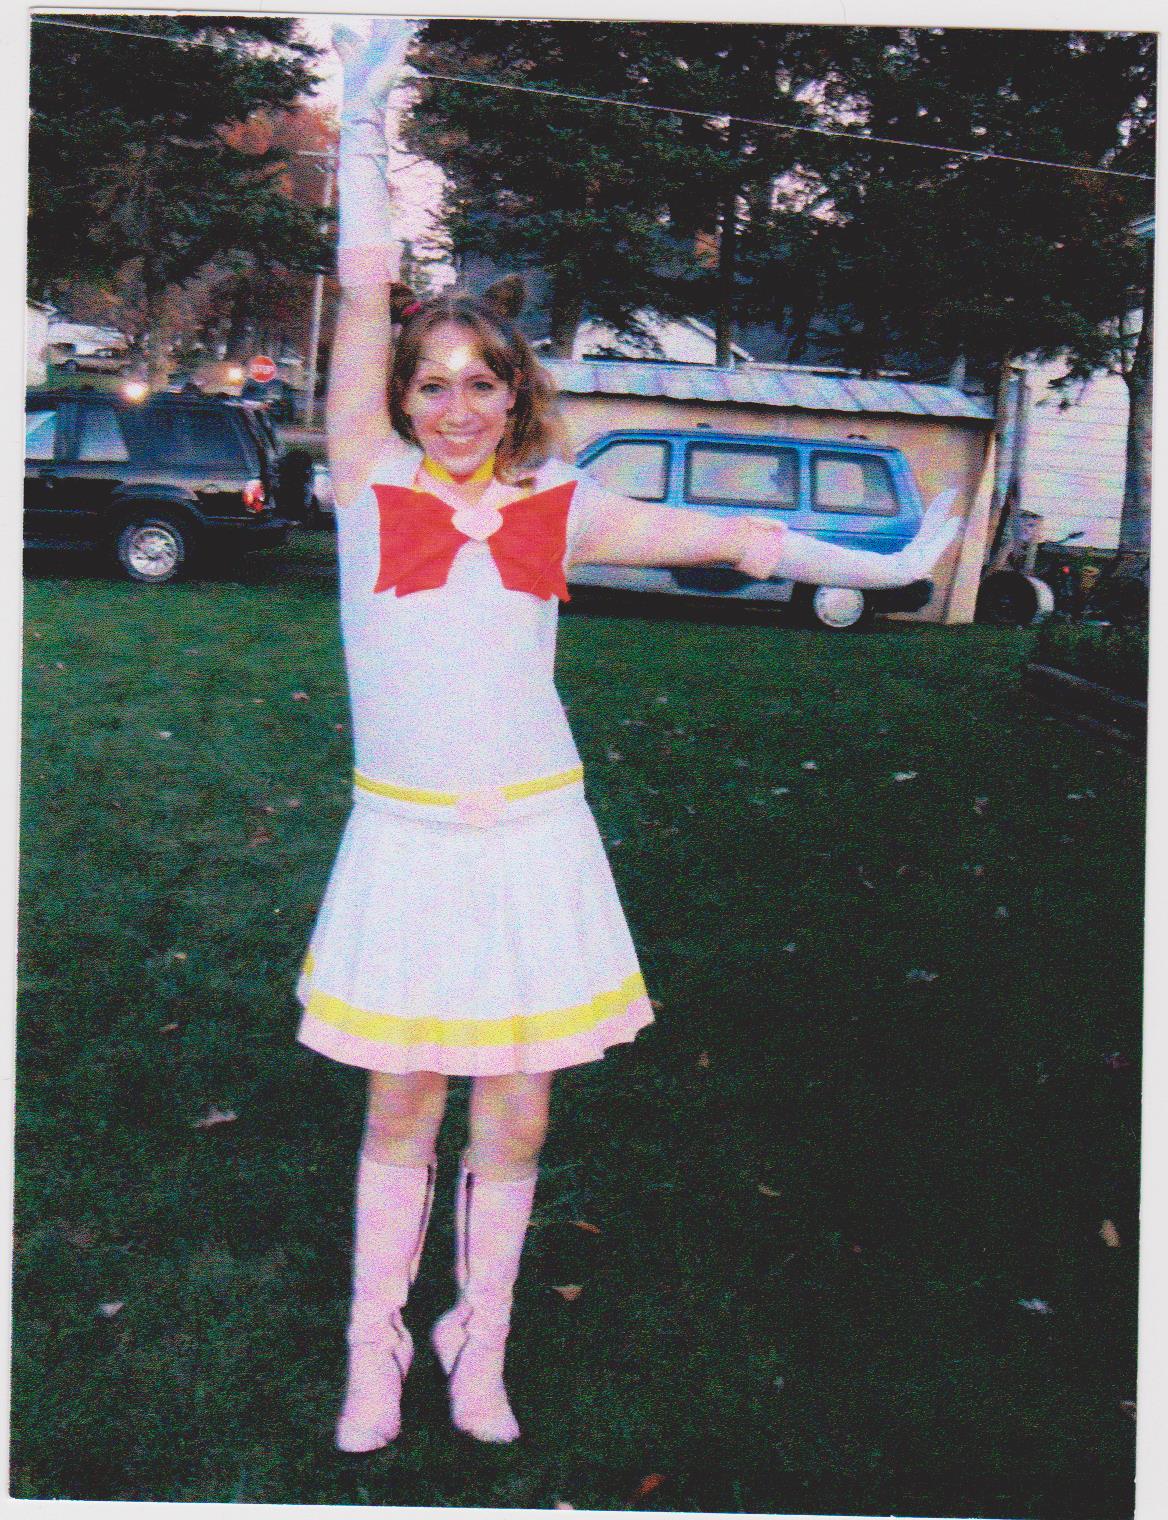
One of my first homemade costumes. I was still in school at the time and had plenty of help with it's progress.

Lorem ipsum dolor sit amet nisl sed nullam feugiat.
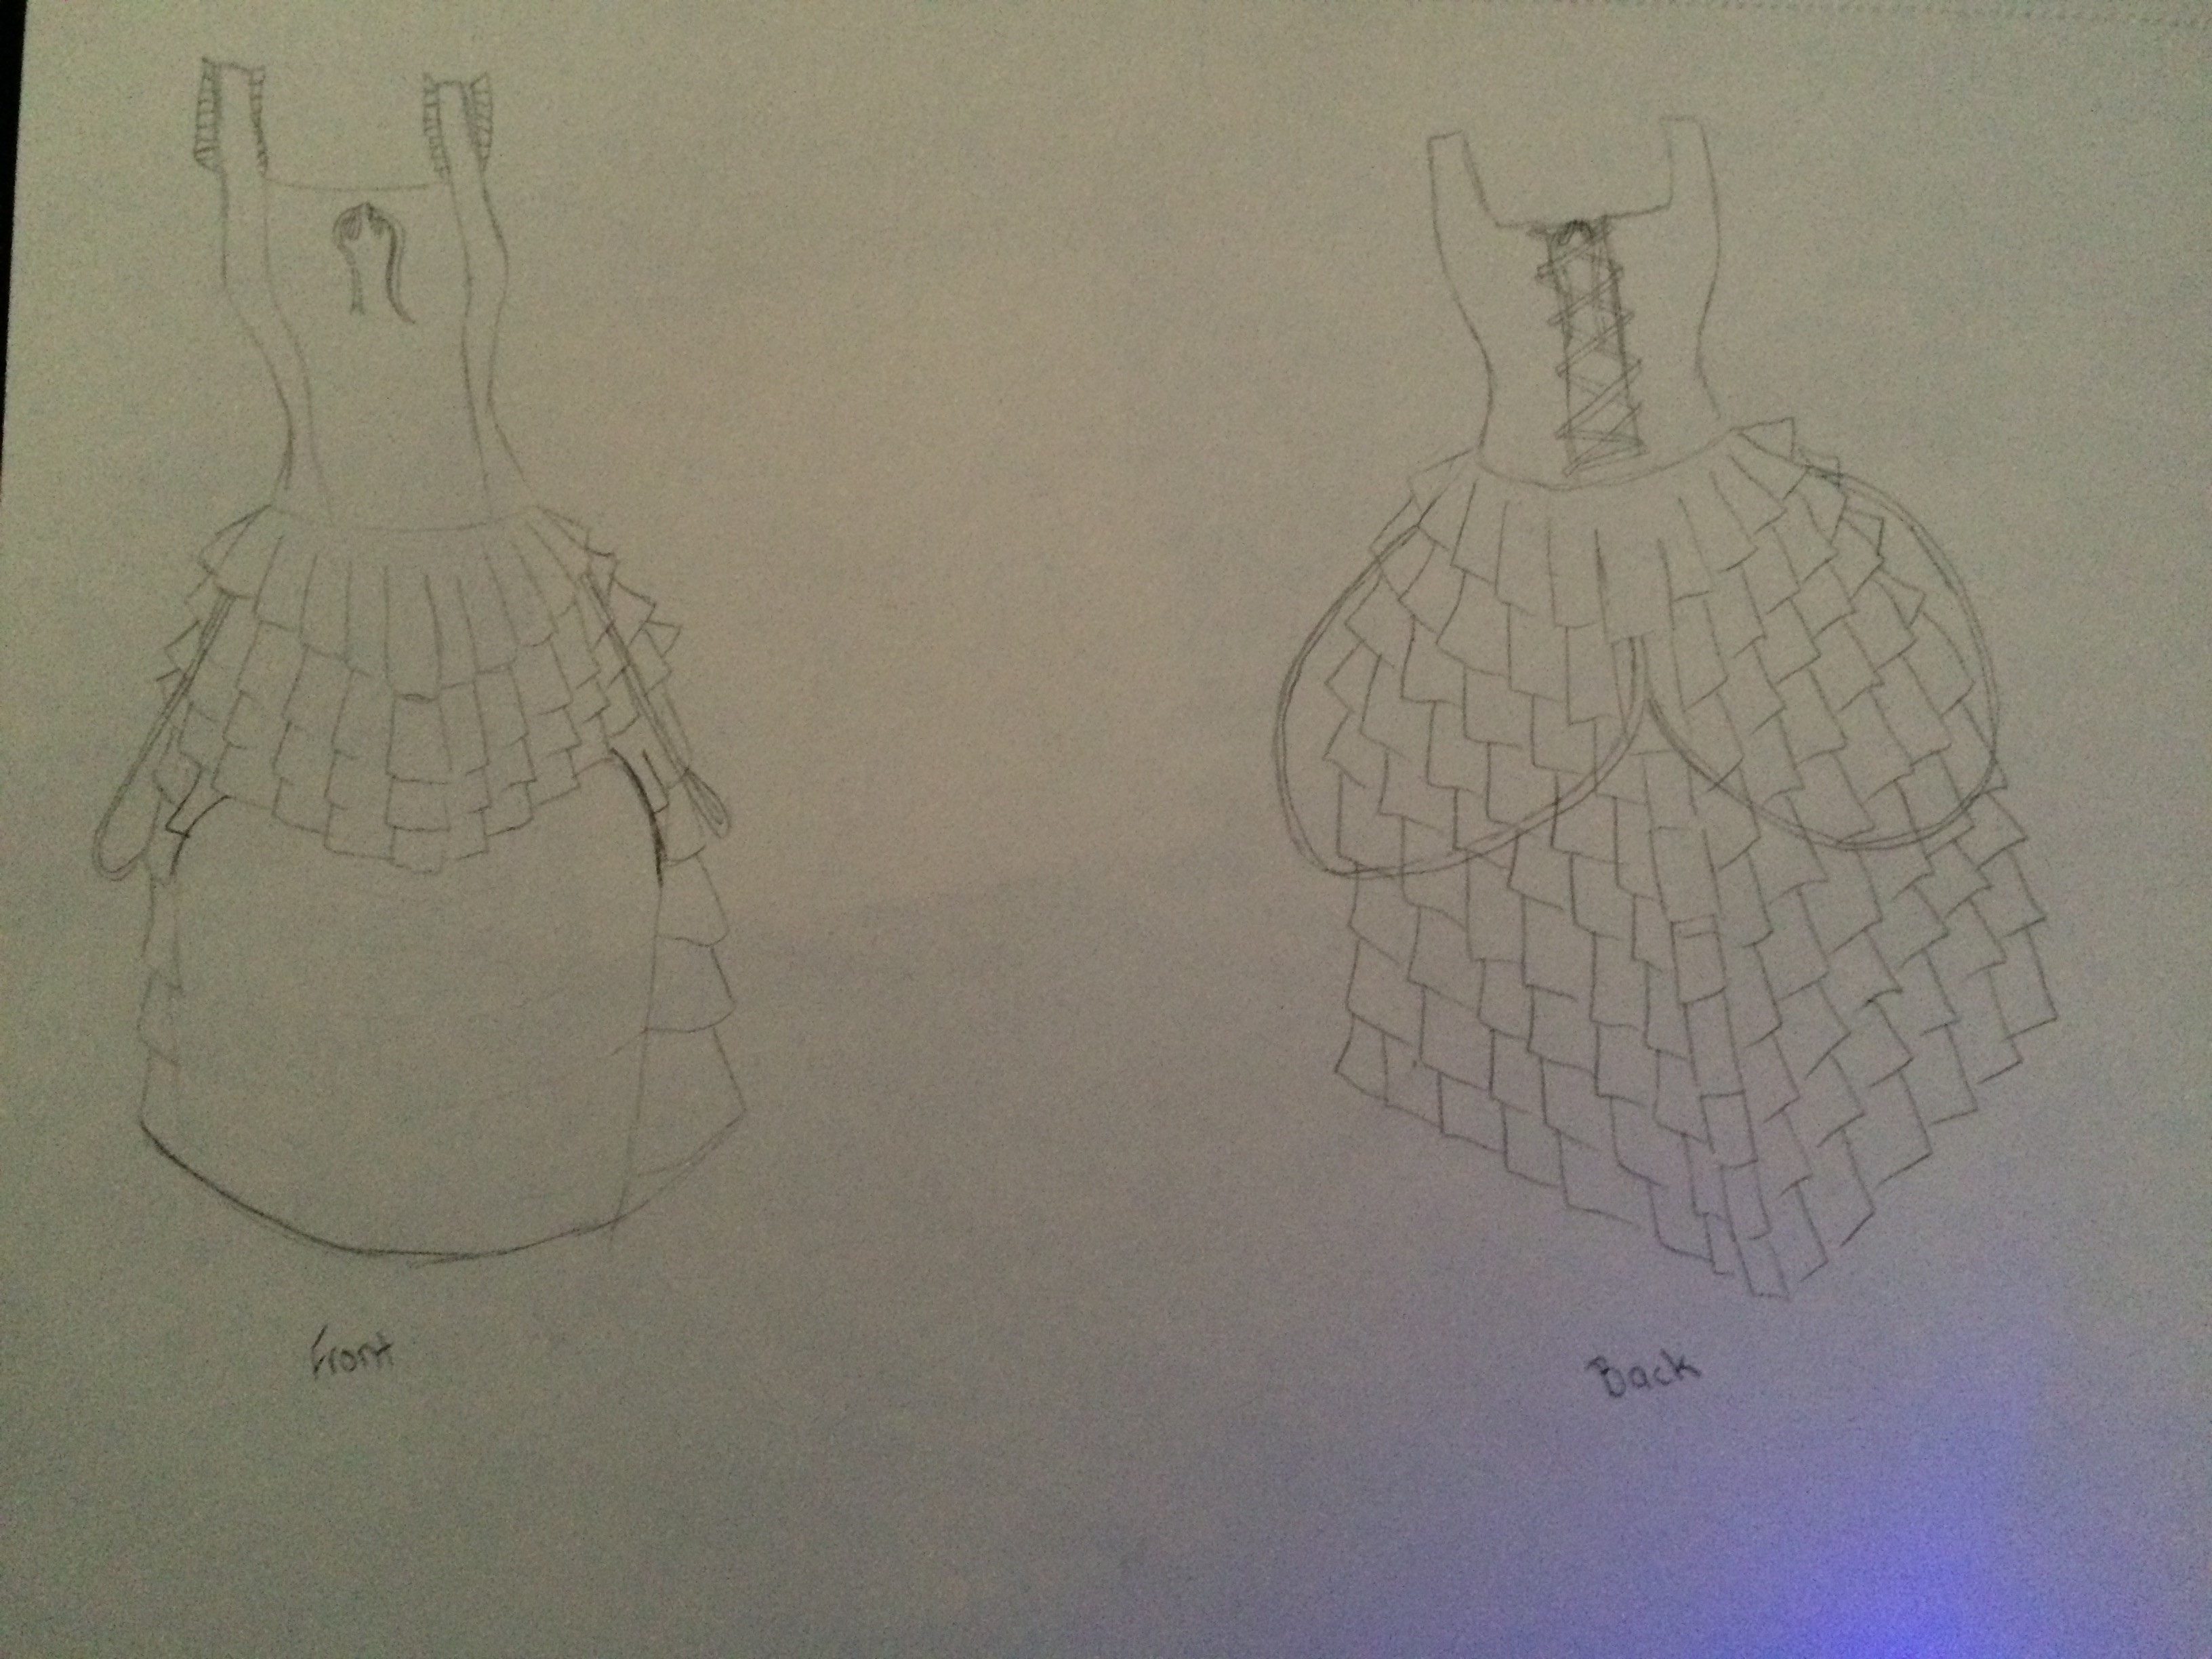
The very first thing you want to do is draw or sketch your vision. I know it sounds pointless, but you will understand more of how to put it together. As you draw it, think of how you can create the desired effect and with which materials. Keeep in mind, the sketch obviously doesn't have to be pretty, it just has to be enough to give you a clear idea. Then, get your measurements.

This makes you think of how to make it fit to your body. Think of where material would have to be longer/wider or more narrow/shorter. Make notes for yourself (an idea for a detail/certain fabric for an area/add a different color/etc.) and make sure to write down measurements.

I have always said "If you can't make it work with paper, material won't be any easier." Sure paper is less fitting, but it gives you not only an outline for your material but you can fit the costume without having to actually make it then alter the finished piece. Add a stitch guide line about 1/4 inch from the edge of each piece.
This once again can be a step skipped for experienced people, but believe me, it's easier to sew anything with a guide line. Don't use the fabric you plan on using for the visible part, you don't want to risk running out. Use an old (clean) bed sheet and from your paper pattern, trace where the stitches should go. This also makes your costume more durable.